Connecting Stripe
Connecting Stripe lets your booking page charge cards straight into your own account. roomZy never holds the money and takes no fee — Stripe's normal processing fee is your only cost, the same as any card terminal.
Where to do it
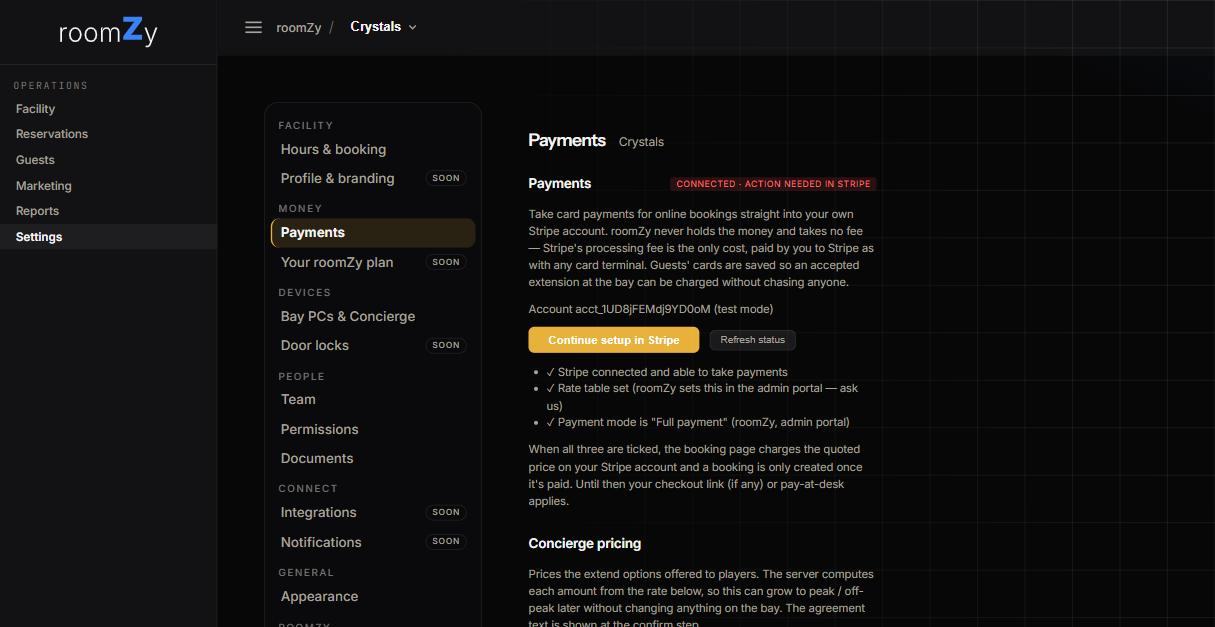
In the dashboard, open Settings → Payments. The Stripe account card is at the top; How guests pay under it sums up the rules that apply.
Steps
- Press Connect Stripe (or Continue setup in Stripe if you've started). You'll finish on Stripe's own secure pages.
- roomZy creates a full Stripe account for your venue — with its own Stripe dashboard — and walks you through the setup. If you already use Stripe for something else, this is a separate account dedicated to your roomZy bookings; that's expected, not a duplicate to worry about.
- Complete Stripe's identity check — Stripe requires this before it will pay out. Charges can work before payouts are switched on.
- Back in roomZy, press Refresh status to pull the latest state.
How guests pay
The summary under the Stripe card
- Prices — set or not, on Pricing & bay types (that one's yours).
- Payment — paid in full when they book, a deposit, or at the desk.
- Cancellation — how far ahead a cancellation is free, and whether it's refunded.
- No-show fee — on or off, and how much.
Payment, cancellation and no-show rules are set up with roomZy; ask us to change them. Online charging starts as soon as Stripe is connected; until then guests pay at the desk.
"Action needed in Stripe" is normal at first
A brand-new connected account often shows "connected · action needed in Stripe." That means charges work but payouts are paused until you finish Stripe's identity/representative check. Press Continue setup in Stripe to complete it. Once done, Stripe pays out to your bank on its normal schedule.
What connecting unlocks
- Card on file — an accepted Concierge time-extension is charged automatically, no chasing.
- Refunds & cancellations from the reservation card.
- Memberships & gift cards sold online.
For the bigger picture of payment options (including Square/Clover), see Setting up payments.